Start with safe prep, set depth, guide slowly, and make overlapping passes.
If you want a clean, workable garden bed fast, learning how to use front tine tiller the right way matters. I’ve tilled dozens of plots, from hard clay to soft loam, and I’ll walk you through the setup, the passes, the rhythm, and the tricks that make a front-tine tiller feel easy and safe. Keep reading for expert tips, field-tested steps, and smart fixes that save time and help your soil.

What is a front-tine tiller and when to use it
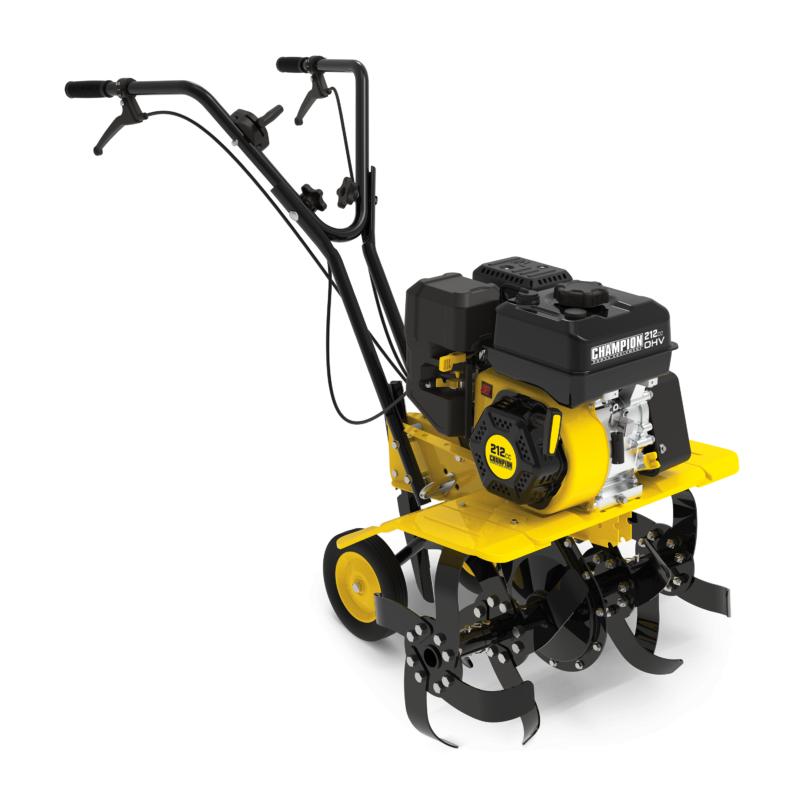
A front-tine tiller has its blades in front of the engine. It is lighter and easier to maneuver than a rear-tine tiller. It shines in small to medium beds, raised beds, and tight corners.
If you are unsure how to use front tine tiller for new ground, start slow. It will work in sod or compact soil, but it may need more passes. For gardens that need quick prep or weed mixing, it is a great pick.
Match the tool to the task. Use a front-tine for mixing compost, breaking light crust, and shaping beds. For heavy roots, rocks, or one-pass deep tilling, use a rear-tine model.

Safety and prep checklist
Before you learn how to use front tine tiller, set up right. A few minutes now prevents hours of headaches.
Do these checks:
- Read the manual. Know the controls, throttle, choke, and kill switch.
- Inspect the tines. Replace bent or dull tines for cleaner cuts.
- Check fuel and oil. Use fresh fuel. Confirm oil level and look for leaks.
- Set the depth stake. Start shallow. Go deeper as soil loosens.
- Clear the area. Remove wire, rope, and big rocks.
- Dress for safety. Wear eye protection, gloves, sturdy shoes, and ear protection.
Use the right soil moisture. Grab a handful. If it forms a ball that crumbles with light pressure, you are good. If it smears or drips, wait. Wet soil compacts. Dry soil turns to dust.

Step-by-step: how to use a front-tine tiller
If you came here to learn how to use front tine tiller step by step, this is your roadmap. I use this same flow every spring.
- Start and warm up
- Move the tiller to your plot.
- Open the fuel valve if present.
- Set choke to start. Pull to start. Open the choke as it warms.
- Let it idle for 1 to 2 minutes.
- Plan your passes
- Pick a straight line along one edge.
- Plan to overlap each pass by one third.
- Work across the short side of the bed for easier control.
- First pass: shallow
- Set the depth stake high for a shallow cut of 2 to 3 inches.
- Hold the handles with a relaxed grip. Keep elbows low.
- Engage the tines and let the tiller pull forward.
- Do not fight it. Guide it. If it jumps, ease off and reset.
- Second pass: cross and deepen
- Lower the depth stake a notch.
- Till across your first lines at 90 degrees.
- This crosshatch breaks clods and mixes in compost well.
- Edge cleanup
- Use short, slow passes near borders.
- Feather the throttle to avoid chewing up paths.
- Power down
- Return to idle.
- Switch off. Close the fuel valve if equipped.
Two to three light passes beat one deep, rough pass. This is the big secret of how to use front tine tiller without a fight.
Tilling techniques for different soils and beds
Knowing how to use front tine tiller in different soil saves time and stress. Use these quick tweaks.
Clay soil
- Till only when the soil crumbles in hand.
- Add compost and coarse sand or fine bark.
- Use more passes with small depth changes.
Sandy soil
- Add compost to boost water holding.
- Use a shallow depth to avoid drying.
- Water lightly the day before tilling.
Sod or new ground
- Mow low first.
- Make a shallow pass to cut roots.
- Wait a week for dieback, then till deeper.
Raised beds
- Go shallow to protect structure.
- Mix in amendments evenly.
- Avoid tilling near wooden sides to prevent damage.

Depth, passes, and patterns that work
If you want a quick win on how to use front tine tiller, think layers. Do not chase full depth in one go.
- Depth
- Start at 2 to 3 inches.
- Move to 4 to 6 inches on the second or third pass if needed.
- Keep roots for perennials safe. Avoid deep tilling near trees.
- Pass count
- A typical bed needs two to three passes.
- Extra passes help with tough sod or heavy clay.
- Patterns
- Use straight lines for big beds.
- Crosshatch for better mixing and fewer clods.
- Spiral in small spaces to reduce turns.
These patterns reduce bounce, drift, and fatigue. They also protect soil life by avoiding over-tilling.
Maintenance before and after use
Good care extends the life of your machine. It also makes how to use front tine tiller feel smooth.
Before tilling
- Tighten handle and guard bolts.
- Check belt tension. A slipping belt reduces bite.
- Inspect air filter. Clean if dusty.
After tilling
- Scrape and rinse tines. Dry to prevent rust.
- Check for twine or vines wrapped on the tine shaft.
- Top off fuel with a stabilizer if storing for weeks.
- Store in a dry, covered spot, away from open flames.
Seasonal care
- Change oil per the manual.
- Replace spark plug yearly for easy starts.
- Sharpen or replace tines when rounded.
Common mistakes to avoid
Learning how to use front tine tiller includes knowing what not to do. I have made these mistakes so you do not have to.
- Tilling when soil is too wet. It compacts and forms clods.
- Pushing down on the handles. It makes the machine bounce and skid.
- Skipping a shallow first pass. The tiller will fight you.
- Tilling too deep near drip lines. You can harm feeder roots.
- Forgetting to overlap passes. You get ridges and missed strips.
Troubleshooting: drift, bouncing, clogging, and stalls
Even if you know how to use front tine tiller well, issues happen. Here is how I fix the common ones fast.
- Tiller drifts to one side
- Soil is uneven or a tine is bent.
- Slow down. Reduce depth. Inspect tines and replace if needed.
- Bouncing or walking
- Soil is too hard or you are forcing it.
- Raise the depth stake. Make a shallow pass first.
- Add small weights only if the manual allows.
- Tines clog with vines or wet soil
- Stop the engine. Disconnect the spark plug wire.
- Clear debris with a stick or pliers. Avoid hands near tines.
- Engine stalls under load
- Check choke, fuel, and air filter.
- Reduce depth and throttle up smoothly.
- Inspect belt tension and carb settings if problems persist.
Soil health and timing tips
Good soil is the goal. Using these habits will make how to use front tine tiller kinder to your garden.
- Till only when needed. Over-tilling breaks soil structure.
- Add compost each season. Two to three inches, then till shallow.
- Time tilling for cool hours. It reduces moisture loss.
- Use mulch after tilling to protect the surface.
- Rotate beds to limit pests and disease buildup.
These small choices add up. You get better tilth, fewer weeds, and less work next year.
Frequently Asked Questions of how to use front tine tiller
How deep should I till with a front-tine tiller?
Start at 2 to 3 inches, then go deeper if the soil loosens well. Most beds do fine at 4 to 6 inches.
Can a front-tine tiller break new sod?
Yes, but it may need two or three passes. Mow low first and let the first shallow cut sit for a week before going deeper.
What soil moisture is best for tilling?
Till when a handful crumbles with light pressure. If it smears or sticks, wait for drier conditions.
How do I keep the tiller from bouncing?
Use a shallow first pass and slow, steady forward speed. Do not push down on the handles; let the tines pull.
Should I add compost before or after tilling?
Spread compost first and then till shallow to mix. Rake smooth and mulch after to protect moisture.
Conclusion
You now know how to use front tine tiller with confidence: prep right, start shallow, overlap your passes, and protect your soil. A steady pace and smart timing will do more for your garden than raw force ever will. Try these steps on a small bed today, and build your rhythm.
Want more practical garden guides like this? Subscribe for updates, ask a question in the comments, or share your own tiller tips.